
Acrylic Pouring Paint
Acrylic pouring can create unique artworks without you having to even lift a brush. Let gravity help you get creative and mix colours and techniques. Browse the range of vibrant colours and get inspired for your next artwork For professionals and beginners, you’ll find all of your art supplies with access to easy shipping options. Get started on your acrylic pour painting today with ArtStore Online!
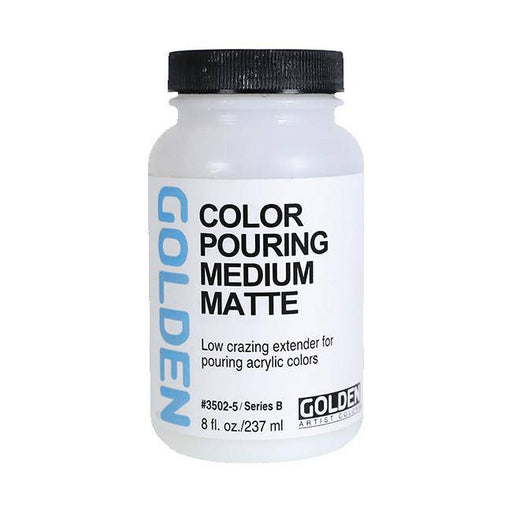
Golden Colour Pouring Medium (Matte)
Original price
$31.75
-
Original price
$161.50
Original price
$31.75
$31.75
-
$161.50
$31.75
-
$161.50
Current price
$31.75
Golden have recently announced a change to GAC 800, it has been replaced by their purpose-built Color Pouring Mediums in Gloss or Matte. Mix Flui...
View full details
Original price
$31.75
-
Original price
$161.50
Original price
$31.75
$31.75
-
$161.50
$31.75
-
$161.50
Current price
$31.75
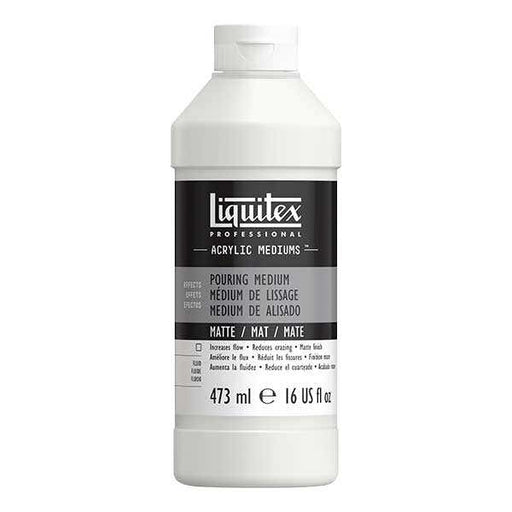
Liquitex Matte Pouring Medium
Original price
$89.50
-
Original price
$89.50
Original price
$89.50
$89.50
$89.50
-
$89.50
Current price
$89.50
Liquitex Matte Pouring Medium lowers the viscosity of heavier body paints, giving increased flow while maintaining colour opacity. It dries to a ma...
View full details
Original price
$89.50
-
Original price
$89.50
Original price
$89.50
$89.50
$89.50
-
$89.50
Current price
$89.50
Acrylic pouring can create unique artworks without you having to even lift a brush. Let gravity help you get creative and mix colours and techniques as part of your creative process. Browse the range of vibrant colours in the acrylic pouring world and get inspired for your next artwork. For professionals and beginners, you’ll find all of your art supplies, including craft paint, fluid paint, and pre-mixed options, with access to easy shipping options. Get started on your paint pouring journey today with ArtStore Online!
Let gravity help you get creative and explore paint flow and high flow techniques. Browse the range of vibrant colours and get inspired for your next artwork.
For professionals and beginners, you’ll find all of your art supplies with access to easy shipping options. Get started on your acrylic pour painting today with ArtStore Online!
What is acrylic pouring paint?
Acrylic pouring, also known as fluid art, is a painting technique in which acrylic paint is mixed with a pouring medium to achieve a fluid consistency and smooth flow. This mixture is then poured onto a canvas or other working surface, allowing the colours to blend and interact in unique, unpredictable ways. The result is often a marbled, abstract design with vibrant colours, soft edges, and a natural gloss finish. Here are the key aspects of acrylic pouring:
What art supplies do I need for acrylic pouring?
Acrylic Paint: High-quality fluid paint or craft paint with a high flow works best. They are often supplied in a squeeze bottle for easy pouring.
Pouring Medium: Used to thin the acrylic paint to the right consistency for pouring while maintaining its colour and binding properties. Some mediums include additives to improve paint flow and finish.
Canvas or Painting Surface: Stretched canvas, canvas panels, or other surfaces like wood panels, ceramic tiles, or even glass. Make sure your canvas is canvas-ready with a base layer such as gesso.
Cups and Stir Sticks: For mixing paint and medium, including layering colours in one cup.
Silicone Oil (optional): Added to the paint mixture to create cells—small, round shapes that form as the paint interacts.
Tarp or Plastic Sheet: To protect your workspace from spills and drips and keep your working surface clean.
Level: Ensures the painting surface is flat, creating a level surface and preventing paint from running off unevenly.
Gloves and Apron: To keep your hands and clothing clean.
What are some basic acrylic pouring techniques?
Dirty Pour: Multiple colours are layered in a single cup or one cup and then poured onto the canvas in one go.
Flip Cup: A cup filled with paint is flipped upside down onto the canvas, perfect for your first pour.
Puddle Pour: Different colours are poured directly onto the canvas one after the other to create puddles of paint and control the flow.
Swipe: Paint is poured onto the canvas, and then a tool (such as a palette knife or paper towel) is used to swipe through the paint, creating cells and patterns with fine details.
Ring Pour: Paint is poured in a circular motion, creating concentric rings with smooth paint flow.
Steps for Acrylic Pouring
Prepare Your Workspace: Cover your work area with a tarp or plastic sheet to catch spills. Make sure your canvas is level on a level surface.
Mix Paint and Medium: In separate cups, mix your acrylic paint with the pouring medium according to the manufacturer's instructions (usually a 1:1 or 2:1 ratio of medium to paint). Stir well until the mixture is smooth with a consistent fluid consistency.
Add Silicone Oil (optional): If you want to create cells, add a few drops of silicone oil to your paint mixture and stir gently.
Pour the Paint: Use your chosen pouring technique (dirty pour, flip cup, etc.) to apply the paint to the canvas and guide the paint flow.
Tilt and Manipulate: Tilt the canvas to spread the paint and create your desired pattern. You can also use tools like palette knives, a blow dryer or a hair dryer to move the paint and create interesting effects along the edges.
Let It Dry: Allow the painting to dry flat for 24-48 hours until it is completely dry. Drying times may vary depending on the thickness of the paint and environmental conditions.
Seal the Painting (optional): Once fully dry, you can apply a clear varnish or resin coat to protect the painting and enhance its colours and gloss finish.
Tips for Acrylic Pouring
Experiment with Ratios: Different ratios of paint to pouring medium will produce different effects. This is part of the creative process, so experiment to find what works best for you.
Avoid Overmixing: Overmixing can lead to muddy colours. Stir the paint and medium just enough to combine and maintain good flow.
Use High-Quality Paints and Mediums: Better-quality materials yield better results and more vibrant colours.
Be Patient: Allow ample drying time to avoid smudging or cracking the paint. Let your artwork become completely dry before handling.
Whether it’s your first pour or you’re refining your skills, there’s always room to experiment and improve. We hope you enjoy exploring the acrylic pouring world and creating unique, abstract artworks.